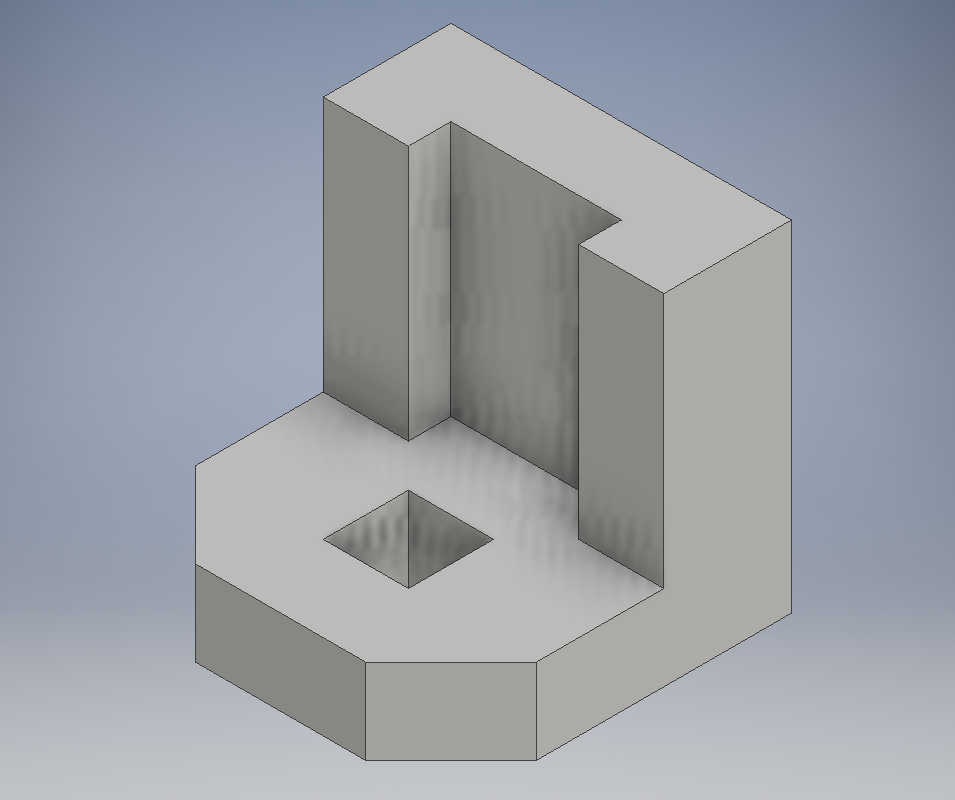
Inventor Drawings
Autodesk inventor is a Computer Aided Design (CAD) software. This means that it allows a user to create objects in files that a computer can understand and display in 3 dimensions. This can be very helpful in architecture, engineering and 3D printing. In our IDEA class we learned how to use this program to create online and real 3D models of objects, called. These Widgets were created using the Autodesk Inventor software.

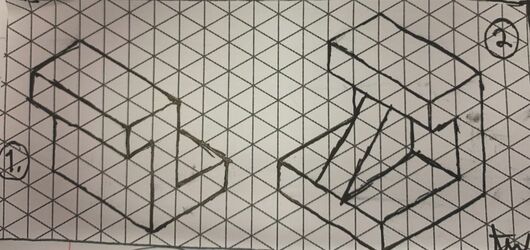
Widget Sketches
I'll be doing a step by step run down on how to make this wonderful widget.
|
|
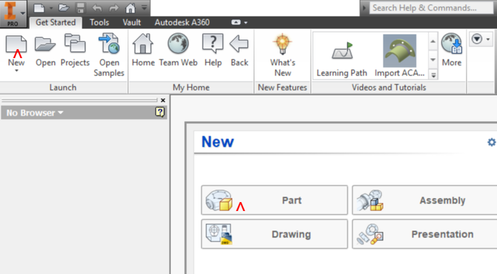
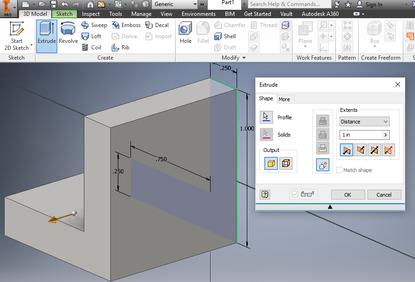
1. Start by opening a new Autodesk Inventor file. Click either the "new" button or the "part" button.
2. Click 2D Sketch and use the line tool.
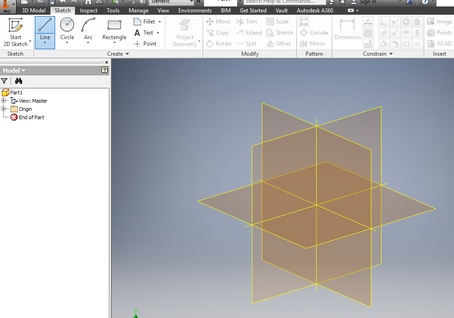
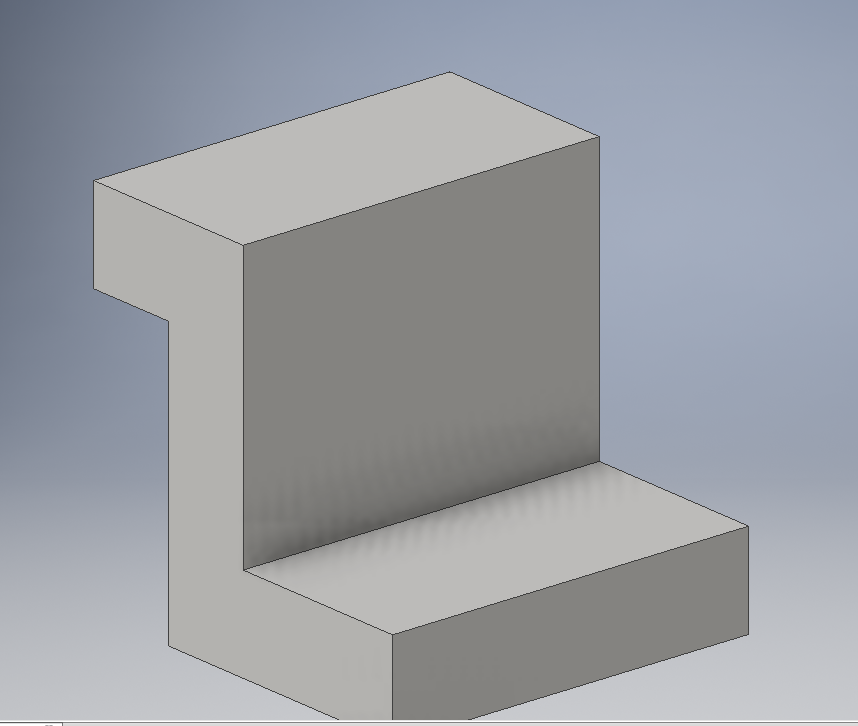
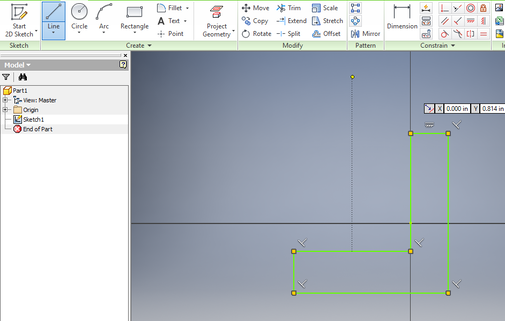
3. Click on the X,Y plane and make a L shape, or the side view of the widget.
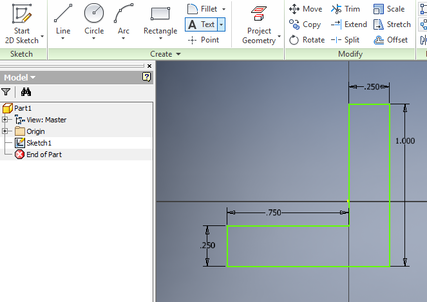
4. Dimension the lines as according to the side view of the widget.
5. Move to the 3D tab and extrude your drawing 1 inch.
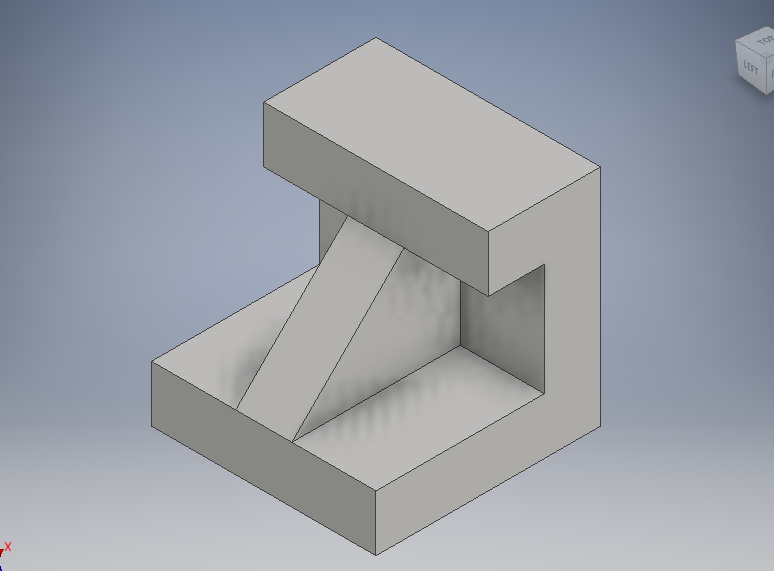
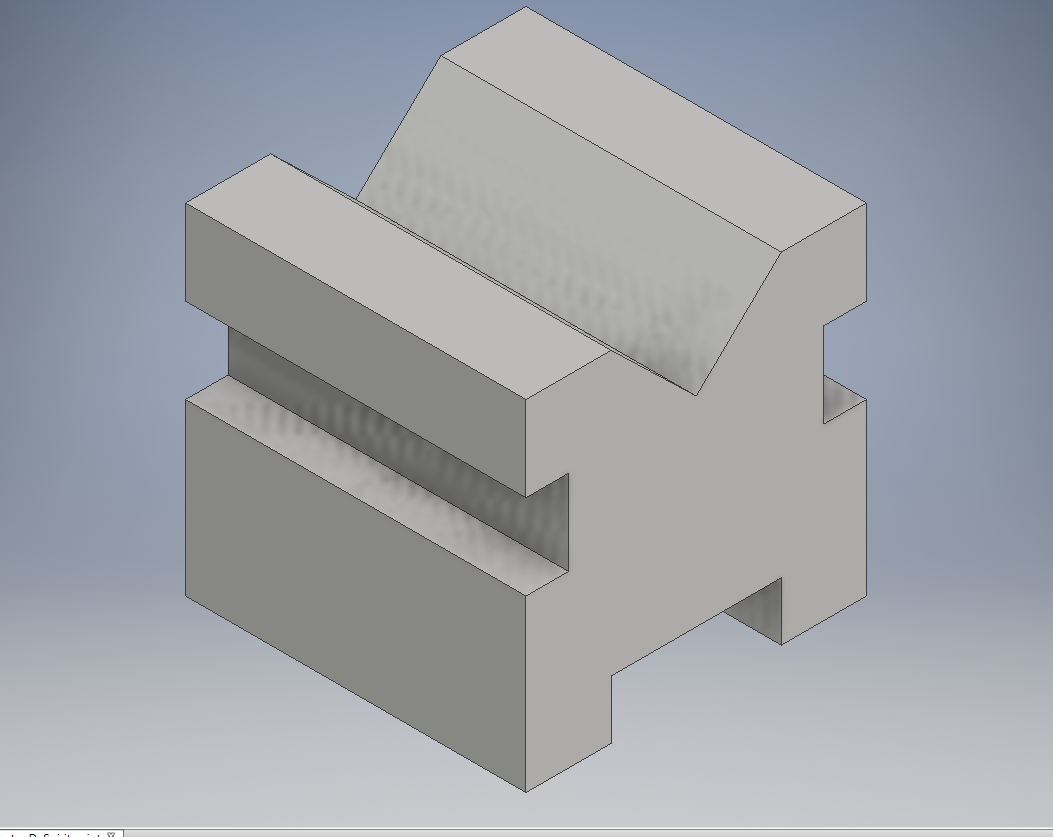
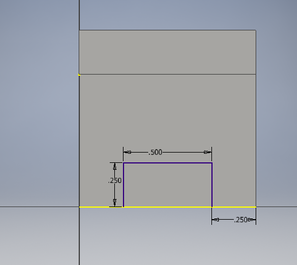
6. Go back to the line tool and draw the rectangular cut out on the front of the shape (dimension).
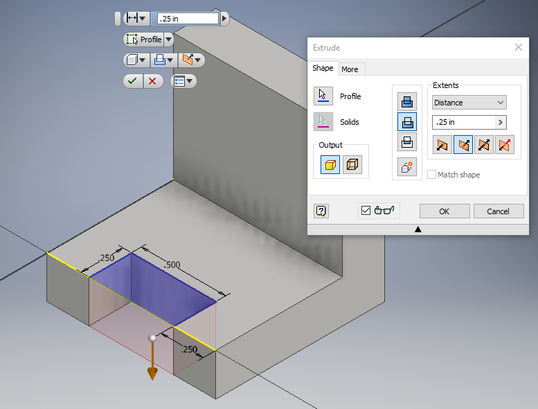
7. Extrude that rectangle down .25 inches in order to "delete it from the shape.
8. Draw out the rectangle and dimension it on the top of your shape.
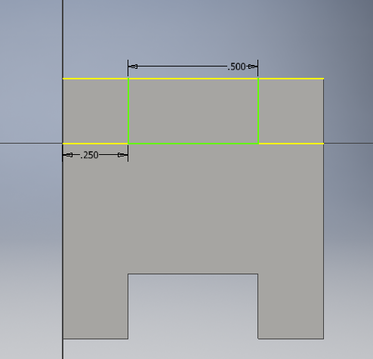
9. Extrude that drawing down .5 inches to delete that area.
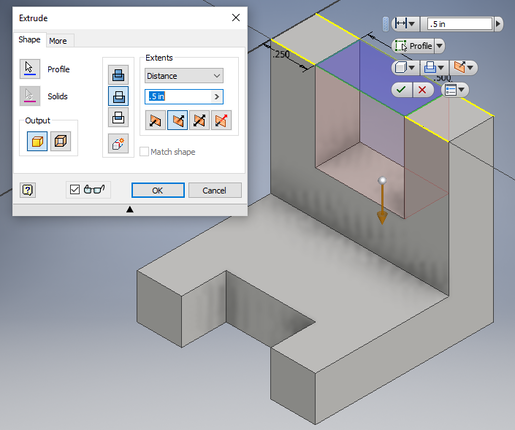
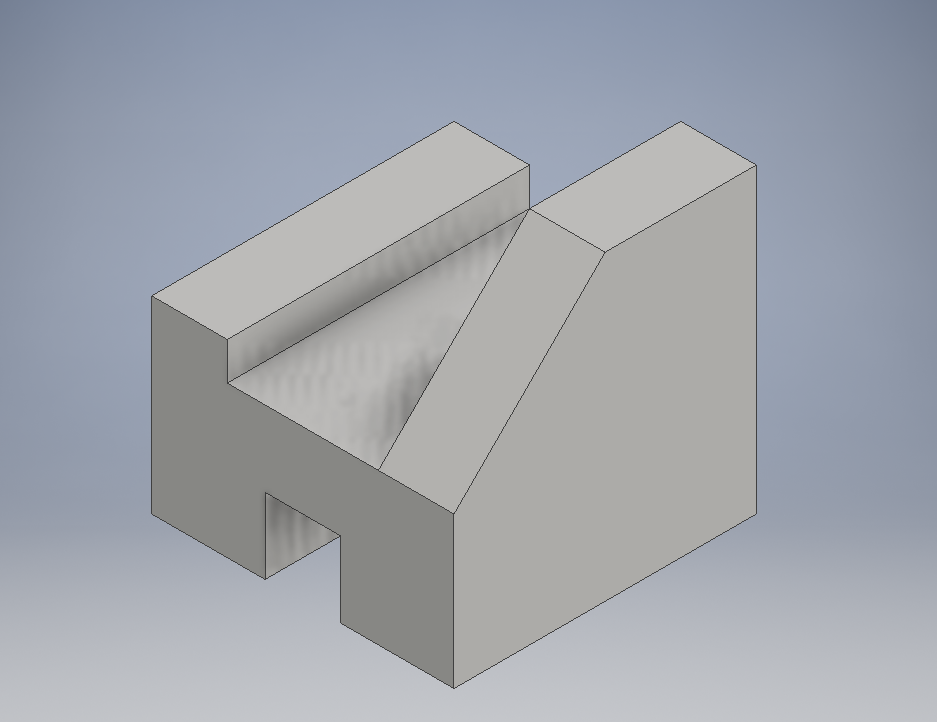
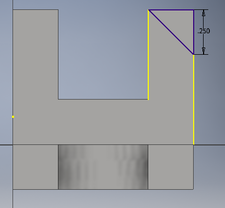
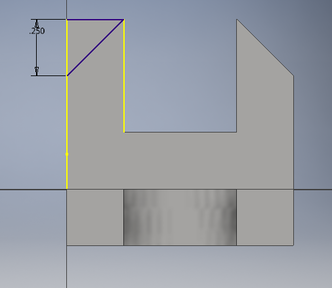
10. Draw a triangle and dimension it on one of the pillars on the backside.
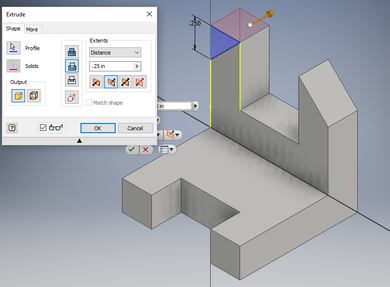
11. Extrude this backwards .25 inches to delete that section.

12. Repeat that step on the other pillar and you are finished! Save it to your H-drive
|
|
3D printing
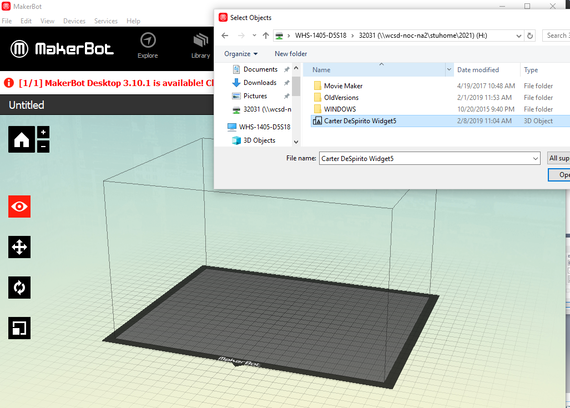
13. Save that inventor file as a STL file by clicking export, and open it in the maker bot software (find it using the search bar on the bottom left).
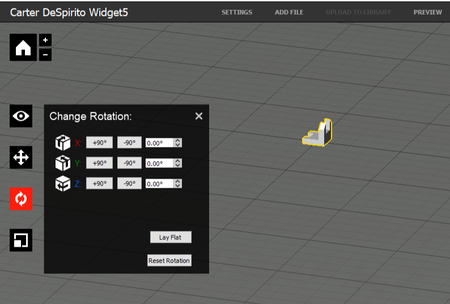
14. Open the file and Click on the rotation button and select lay flat. Then click rotate 90 degrees until it is on a side that will allow for no supports.
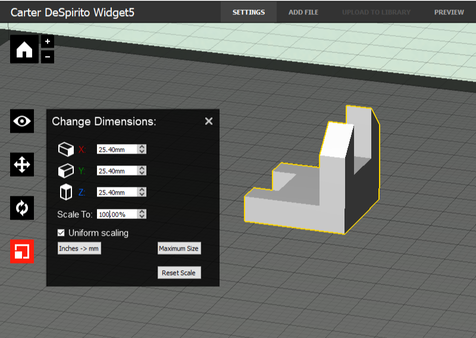
15. Then select the scale object thing and make the percentage 1000% and make sure it is at 24.5 mm
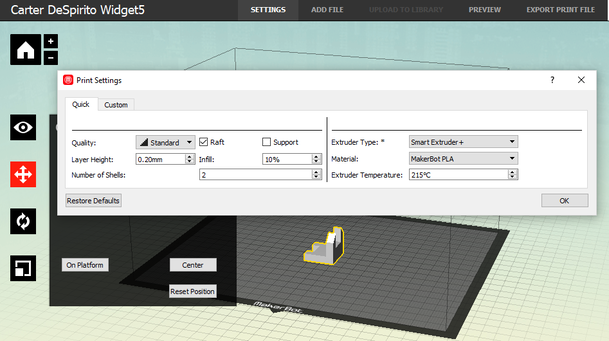
16. Double check that it is laid flat and scaled correctly, then you have to check the settings tab: Quality: Standard, Raft: Check, Supports: should have none, Extruder Type: Smart Extruder+, Extruder Temp 215C. Once that is set you can click OK.
17. After that you may export the file, naming it as instructed, save it to your H-drive, but press the print preview button to see the layers that will be added during printing, and then put it onto your flash drive.
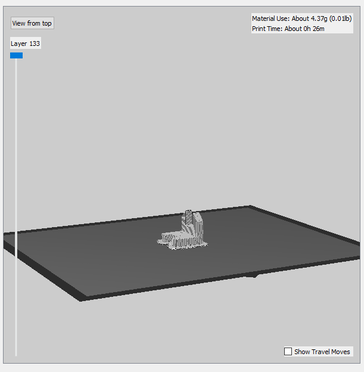
18. Bring your loaded flash drive down to a printer and plug it into the port, use the scroll wheel on it to reach "USB" then select your file by scrolling to it and pushing the control wheel. Wait for your raft to start printing before leaving.
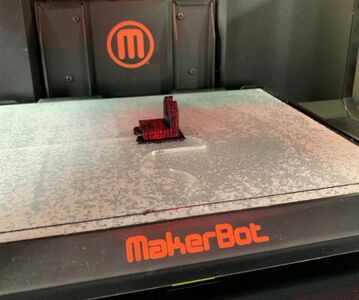
19. Peel the raft off of the bottom of your print and you are finished!

Throughout this project I learned many things. First among them was a deeper understanding of the inventor software, as I had only used it a few times and with minimal projects. This learning process allowed me to eventually create one of these widgets in a matter on about 2 minutes, and we didn't have a step by step list. I also learned that I need to take pictures much more frequently in order to avoid having to recreate them or trying to take more later. Besides all of these wonderful learning experiences, another significant one was that I learned how to 3D print an object, which I had done once before, but it had been a preset design, not one I had spent my own time creating. Overall this project was very enjoyable and it makes me excited to see what the rest of the semester has in store for me.
